command-line

SignLoop

Para ejecutar una instancia de SignLoop  completa debemos llevar a cabo la siguiente llamada:


java -cp "%CLASSPATH%" es.isigma.ism.autosign.AutoSign inbox outbox [ selector ]

inbox y outbox son nombres de carpetas en tu ordenador. SignLoop recogerá todos los archivos a

firmar de inbox, los firmará electrónicamente y guardará en outbox.

El parámetro opcional selector es una expresión regular que se usará para seleccionar un certificado entre los disponibles. El primer certificado cuyo Distinguished Name (DN) del sujeto coincida con la expresión regular será seleccionado. Si el parámetro no está presente, se usará una selección manual interactiva.

Ejemplos de expresiones regulares:

• .*CN=Peter Frampton.* - selecciona el primer certificado cuyo Common Name (CN) empiece con Peter Frampton •

.*C=ES,.* - selecciona un certificado cuyo país (C) sea ES (España)

Ejemplos:


java -cp "%CLASSPATH%" es.isigma.ism.autosign.AutoSign \
        C:\inbox C:\outbox ".*CN=Mariano.*"

Si tienes dudas acerca de cual es el DN del sujeto para el certificado que quieres seleccionar, puedes arrancar AutoSign sin parámetros, y seleccionar uno manualmente. La salida estándar te dará entre otros el DN del sujeto del certificado seleccionado, p.e.:


Certificado Seleccionado: CN=Paula Davies, OU=Development, O=Big Co Inc.,L=Canberra, C=AU

Ejecutando SignLoop de este modo, puedes arrancar instancias múltiples, cada una de ellas firmando archivos de una carpeta de entrada distinta, con un certificado distinto.

CUIDADO: No pongas el caracter \ al final de una ruta ya que puede escapar las comillas que hayan a continuación y no reconocer el siguiente parámetro.


Si queremos evitar el diálogo de entrada de PIN, también podemos añadirlo como parámetro al final, tal como muestra el siguiente ejemplo:


java -cp "%CLASSPATH%" es.isigma.ism.autosign.AutoSign inbox/ outbox/ '.*CN=Demo.*' ismdemo

SDK para desarrolladores

Clicksign dispone de una interfaz gráfica sencilla e intuitiva pero, ¿qué pasa si queremos integrar la funcionalidad de firma electrónica de Clicksign en nuestra propia aplicación? Si nuestro lenguaje de programación permite ejecutar subprocesos debemos lanzar una llamada a la clase (binario ejecutable de Java) que deseemos. Esto lo podemos probar desde una terminal de comandos.

Busca los métodos que quieras aplicar a través de las opciones de menú de la izquierda.

Función verificar

Para verificar una firma electrónica disponemos de la clase VerifySignature:

java -cp "%CLASSPATH%" VerifySignature Hello.signed.pdf
java -cp "%CLASSPATH%" VerifySignature Hello.txt.p7a

En el caso de la firma detached debemos pasar el fichero original y la firma:

java -cp "%CLASSPATH%" VerifySignature Hello.txt Hello.txt.p7d

Función firmar

Si queremos firmar un documento PDF debemos llamar a la clase SignFile, la llamada será la siguiente:


java -cp "%CLASSPATH%" SignFile Hello.pdf Hello.signed.pdf

Donde Hello.pdf es el fichero PDF de entrada que queremos firmar y Hello.pdf.signed el fichero de salida que se generará con la firma.

Por otro lado puede ser que nos interese firmar otro tipo de fichero, por ejemplo un .txt. Para ello ejecutamos la siguiente orden:


java -cp "%CLASSPATH%" SignFile Hello.txt Hello.txt.p7d

De esta manera generamos una firma detached, por otro lado, si deseamos llevar acabo una firma atached debemos ejecutar el comando de la siguiente manera


java -cp "%CLASSPATH%" SignFile -a Hello.txt Hello.txt.p7a

Para automatizar el proceso seleccionando el certificado y pasando el PIN, debemos usasr el siguiente comando:


java -cp "%CLASSPATH%" es.isigma.ism.winmenu.SignFiles --certificate ".*CN=Nombre cert.*" 
--pin clave --out-file ruta_fichero_salida -no-gui ruta_fichero_a_firmar
Aplicando las rutas de documento y PIN correctos.

Si quieres puedes firmar varios de golpe en una sola orden, la única regla es que tengas un flag --certificate con el certificado a continuación y otro flag --pin con la clave. Por ejemplo:


java -cp "%CLASSPATH%" es.isigma.ism.winmenu.SignFiles documento1.pdf documento2.pdf 
--certificate ".*CN=EMPRESA-X .*" 
--pin clave 


ClickSign para desarrolladores

Clicksign dispone de una interfaz gráfica sencilla e intuitiva pero, ¿qué pasa si queremos integrar la funcionalidad de firma electrónica de Clicksign en nuestra propia aplicación? Si nuestro lenguaje de programación permite ejecutar subprocesos debemos lanzar una llamada a la clase (binario ejecutable de Java) que deseemos. Esto lo podemos probar desde una terminal de comandos.

Java y el Class-Path

Para ejecutar una clase solo tenemos que utilizar el comando java y a continuación la clase que queremos ejecutar.

java <nombre de clase>

Clicksign empaqueta todas las clases en en diferentes ficheros .jar los cuales se encuentran en el subdirectorio lib  del directorio de instalación de Clicksign.

De esta manera ¿como sabe Java donde estan las clases cuando llamo a una de estas?

Muy sencillo, solo tenemos que indicarle al comando donde se encuentran las clases, es lo que se conoce como Class-Path. Supongamos que el directorio de instalación es el de defecto, para llamar una clase solo tenemos que ejecutar:

java -cp "ruta de las clases e ism.properties" <nombre de clase>

Para que la llamada quede mas limpia configuraremos la ruta con variables de entorno:

set CSHOME=\Archivos de programa\isigma\clicksign\
set CLASSPATH=%CSHOME%;%CSHOME%lib\*

Ahora que tenemos la variable CLASSPATH configurada la utilizaremos en la llamada a java:

java -cp "%CLASSPATH%" <nombre de clase>


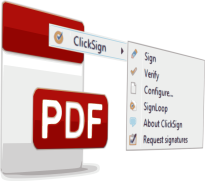
ClickSign for developers

Clicksign has an easy graphic user interface but... ¿What happens if we want integrate the ClickSign signature functions on our own application? If our programing language lets execute a subproccess we have call the class (Java executable binary) that we want execute. We can test it by the system command prompt.

Java and the Class-Path

To execute a class just we have to  use the command java and the class that we want to execute as argument.

java <class name>

Clicksign packages all the class on different files .jar wich there are on the subdirectory lib  of Clicksign installation directory.

And... ¿How knows Java where are the class when I call any of that?

Too easy, we just have to indicate to the command where are the classes, that is know as Class-Path. Assume that the installation directory is the default, to call a class we just have to call:

java -cp "path to the classes and ism.properties" <class name>

You can set a environment variable to have a clean call:

set CSHOME=\Program files\Isigma\ClickSign\
set CLASSPATH=%CSHOME%;%CSHOME%lib\*

Now you have setted the variable CLASSPATH and will be used to the java call:

java -cp "%CLASSPATH%" <class name>

On the following examples you will see the concret functions.

Sign function

If we want to sign a PDF document we have to call the class SignFile:

java -cp "%CLASSPATH%" SignFile Hello.pdf Hello.signed.pdf

Where Hello.pdf is the input PDF file that we want to sign and Hello.signed.pdf is the output PDF file with the signature.

Maybe we want sign another kind of file, by example a .txt:

java -cp "%CLASSPATH%" SignFile Hello.txt Hello.txt.p7d

By this way ClickSign performs a detached signature, or if we want an atached signature we have to execute:

java -cp "%CLASSPATH%" SignFile -a Hello.txt Hello.txt.p7a

Verify function

To verify a signature you have the VerifySignature class:

java -cp "%CLASSPATH%" VerifySignature Hello.signed.pdf
java -cp "%CLASSPATH%" VerifySignature Hello.txt.p7a

On detached signature case you have to indicate the original file and its signature:

java -cp "%CLASSPATH%" VerifySignature Hello.txt Hello.txt.p7d

Timestamp

To make a timestamp for our file call the class GetTimeStamp and indicate the TSA (Time Stamp Authority) URL :

java -cp "%CLASSPATH%" GetTimeStamp \ 
    Hello.txt http://timestamping.edelweb.fr/service/tsp

You will get the file Hello.txt.stamp with the timestamp.

If we want verify the timestamp:

java -cp "%CLASSPATH%" VerifyTimeStamp Hello.txt Hello.txt.stamp

SignLoop

To execute SignLoop instance we have to call:

java -cp "%CLASSPATH%" es.isigma.ism.autosign.AutoSign inbox outbox [ selector ]

inbox and outbox are names of directories on your machine. SignLoop will get all the files to

sign from inbox, will sign and save at outbox.

The optional parameter selector is a regular expresion that will be used to get a certificate between the available. The selected certificate will be the first that matches with the subject Distinguished Name (DN) regular expression. If the regular expresion (last) parameter is not present an interactive mode to select it will be used.

Regular expression samples:

• .*CN=Peter Frampton.* - selects the first certificate that the Common Name (CN) starts with Peter Frampton •

.*C=ES,.* - selects a certificate with the country (C) ES (Spain)

Examples:

java -cp "%CLASSPATH%" es.isigma.ism.autosign.AutoSign \
        C:\inbox C:\outbox ".*CN=Foo.*"

If you doubt about what is the certificate subject DN that you want select you can call SignLoop without parameters and choose one manually. You will get by standard output the selected certificate subject DN, for example:


Choosed certificate: CN=Foo Bar, OU=Development, O=Big Co Inc.,L=Canberra, C=AU

Executing SignLoop by this way you can boot the number of different setted instances that you want with different certificates and directories.

WARNING: Do not put the character \ at the end of a path because it will scape the following double quotes and skip the last argument.


Some of our customers...

CatCert
apdcat
Mitsubishi Electric
Firmaprofesional
Barnatrans
Cambra de Comerç de Barcelona
Seur
Osborne
Chevrolet
Universitat Rovira i Virgili
Esade
Ajuntament de Manresa
Universitat Ramon Llull
Ordesa
AIDIMA
CCCB
Verificaciones Industriales de Andalucía
Ajuntament de Cornellà de Llobregat
FundeSalud
Caixa d'Enginyers
DigiSign
Professional staff
Consejo Andaluz de Veterinarios de Andalucía
Il·lustre Col·legi de Veterinaris de Barcelona